A good pot of chicken stock begins with tactile observation rather than haste. When we stand over the stockpot, we work with heat, water, animal tissue, and gravity to coax out clean collagen without agitating the liquid into an opaque emulsion. Clear stock, or fond blanc de volaille, is not a decorative vanity; it is proof of gentle thermal control. The absence of turbidity keeps the flavor crisp and focused, ready to anchor pan sauces, reduce into glazes, or serve as a pristine poaching liquor.
Achieving this clarity on a home cooktop requires that we respect the physics of protein coagulation. Rapid boiling violently breaks down rendering fats and stray particulate into micro-droplets that stay suspended indefinitely. By choosing dense cuts rich in connective tissue, starting from cold tap water, and holding the pot at a quiet, sub-boiling tremble, we allow unwanted impurities to rise intact to the surface where we can gather them cleanly. The reward is an amber liquor that sets into firm jelly when cold and pours bright and lucid when warm.
Selecting Bones for Collagen and Mineral Depth
Every bone in a chicken carves out a different dimension in the finished broth. Meat imparts sweetness and aroma, marrow introduces savory iron notes, and articular cartilage supplies the structural backbone of stock: collagen. For a yield that forms a solid gel in the refrigerator, we build a bone blend weighted heavily toward connective tissue rather than bare muscle scrap or bleached soup bones.
Chicken feet and wing tips are unrivaled for their proportion of skin, tendons, and small joints. When submerged and held at extraction temperatures, their triple-helix collagen molecules slowly unwind into soft, water-soluble gelatin. Chicken backs and necks provide the mineral foundation, carrying enough residual dark meat to yield real chicken character without introducing the heavy, muddy tones that come from whole-leg trimmings. If we use a whole raw carcass left over from butchering, we make sure to split the spine and cleave the joints with a heavy knife so the water can penetrate the inner marrow cavities directly.
Raw bones yield the purest, pale-gold hue. Roasted bones deliver deep caramelized notes, but the high dry heat changes surface proteins, yielding darker, woodier undertones and sometimes looser gels. For our clear white stock, we keep the bones raw, raw-chilled, or frozen directly from clean butchery sessions.
| Bone Cut | Primary Contribution | Gelatin Yield | Prep Action |
|---|---|---|---|
| Paws / Feet | Pure collagen, body, mouthfeel | Extremely high | Clip yellow claws, scald outer skin |
| Neck and Backs | Minerals, light meat flavor | Moderate to high | Chop through vertebrae to expose core |
| Wing Tips / Flats | Collagen, balanced sweet fat | High | Split joint ligaments with chef knife |
| Cooked Carcass | Light roasted aroma | Low to moderate | Strip away seasoned skin and dressing |
The Initial Cold Blanch and Rinse
Before we begin our long extraction, we purge the surface albumen and dried blood clusters that cling to the hollow spaces of fresh poultry bones. If left inside the main brew, these loose proteins dissolve and fracture into tiny flakes that drift through the pot, fouling the broth and turning it milky grey. A brief preliminary blanch strips this sediment away cleanly.
We pack 4 to 5 pounds of prepared chicken bones into a deep 8-quart stainless steel stockpot. We cover them with cold tap water by at least 2 inches. Starting cold is essential: slow heating coaxes the soluble surface proteins out into the rising liquid column, where they coagulate into visible, curd-like rafts. If we plunge cold bones into boiling water instead, the outer proteins sear instantly, locking bitter hemoglobin and grit inside the meat pockets only to leak out hours later during the main simmer.
Bring the pot up over medium-high heat until the water reaches a hot, vigorous boil, holding it there for 4 to 6 minutes. You will see a dense, dirty foam churn across the surface. Immediately dump the entire contents through a colander in the sink. The blanch water carries away no meaningful flavor at this juncture, only bitter detritus. Under cold running water, rinse each bone thoroughly, rubbing your thumb along the interior of the spines to flush away the dark kidney tissue and coagulated blood veins. Rinse the pot itself thoroughly to eliminate any ring of scum dried against the steel walls.
Setting the Low Simmer Temperature
Thermal stability governs clarity. Once the scrubbed bones are returned to the clean pot, cover them with fresh, cold filtered water, roughly 4 to 5 quarts. Place the pot on your burner and establish the simmer slowly. Fast heating creates turbulent convection currents that hammer the bones against one another, splintering tiny marrow particles into the liquid like silt in a storm.
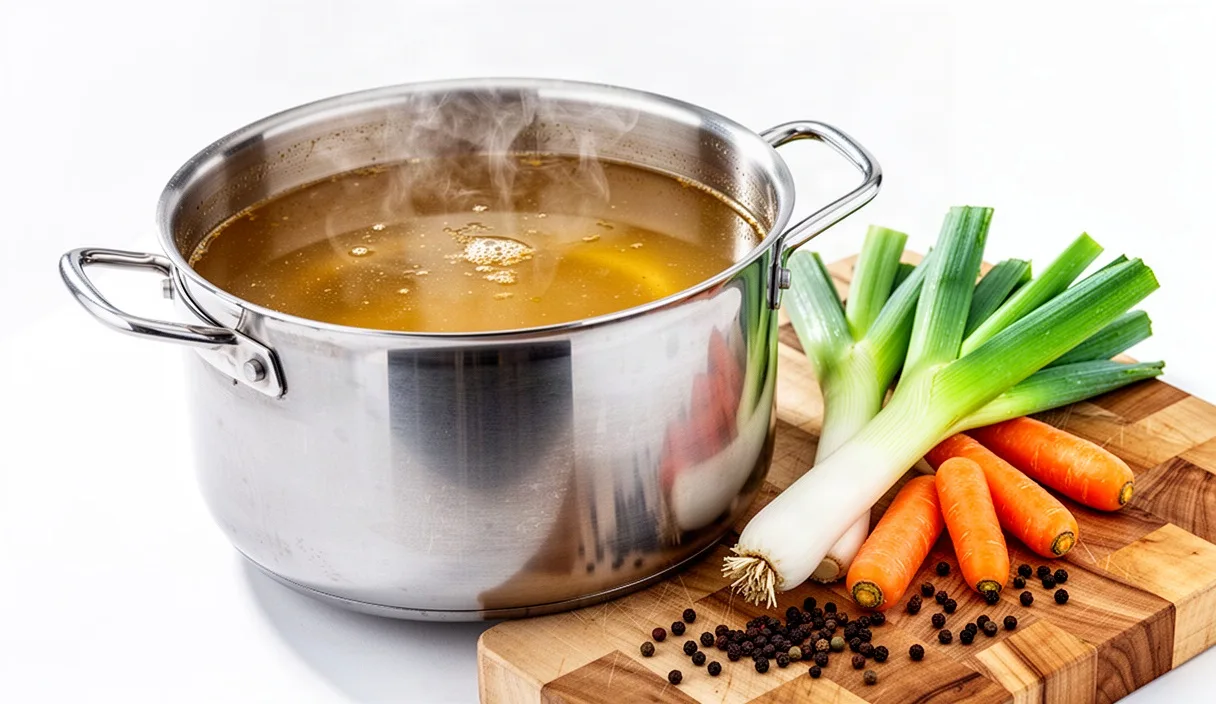
We aim for a water temperature between 180 and 195 degrees Fahrenheit (82 to 90 degrees Celsius). At this threshold, water molecules hold enough kinetic energy to break the peptide bonds in collagen without boiling. Visually, the pot should display what professional kitchens call a "lazy smile": an occasional bubble rising to break the surface every two or three seconds, paired with a gentle, shimmering convection roll. If the water churns violently, lower the flame immediately or slide the pot slightly off-center on the burner grate.
Off-center simmering is an old French stove trick that serves the home cook well. By resting two-thirds of the pot base on the heat source and leaving one-third over cooler air, you establish a directional convection loop. Hot liquid rises on the burner side, sweeps across the top, and drops on the cooler side. This movement pushes all floating impurities and rendering fat into a compact, stable pool along the quiet edge of the pot, turning skimming into a quick, localized task.
Skimming Foam and Fat Off the Surface
During the first 45 minutes of the main simmer, the remaining deep tissue albumen rises to the surface. It appears as an off-white, frothy foam that gathers around the rim. If left unmanaged, the motion of the water draws this foam back under, where heat dissolves it permanently into the liquid, lending the stock a cloudy tint and an oxidized fat flavor.
We keep a small bowl of cold water and a wide, flat-bottomed skimming ladle or a very fine wire mesh skimmer (a spider with 50-mesh weave) next to the range. With flat, shallow strokes, glide the rim of the ladle just beneath the floating surface scum, letting the froth spill over the metal edge while leaving the golden liquid behind. Dip the ladle into the bowl of clean water after each pass to rinse off the adhesive scum before returning to the pot.
Do not stir the pot. Stirring is the primary enemy of pristine stock; it forces settled solids back into suspension and pushes oil pockets down where the convection current can break them into droplets. As fat begins to render out from the skin and pads of the feet, it creates a glistening yellow sheen across the top. We leave a thin veil of this lipid layer intact during the mid-simmer to act as an aromatic seal, preventing aromatic top notes from evaporating, but we skim away heavy pools that exceed an eighth of an inch in depth.
Timing the Aromatic Vegetable Additions
A frequent error in stock-making is dropping mirepoix into the pot at the very start alongside the bones. Root vegetables and herbs break down far more rapidly than dense avian joints. When onions, carrots, and celery endure 4 hours of heat, their pectins and cell walls collapse entirely into a mush that muddies the broth and releases a sour, overcooked vegetable taste.
Bones require between 3.5 and 5 hours to surrender their gelatin; vegetables surrender their optimal aromatic balance in roughly 60 to 75 minutes. Therefore, we introduce our aromatics during the final stretch of the brew. Keep the cut uniform and relatively large, roughly 1 to 2-inch chunks, so they hold their integrity in the gentle current without sloughing off fibrous pulp.
- Yellow Onions: Trim the root end, leave the paper skins on if you prefer a richer amber-orange hue, or peel them completely for a pale, crystal broth. Quarter them cleanly.
- Carrots: Scrub clean rather than peel, as the skin contains earthy sugars, and slice into thick 2-inch rounds. Do not shred or grate.
- Celery: Include the leafy tops, which hold bright volatile oils, cut into large segments.
- Bouquet Garni: Tie fresh flat-leaf parsley stems, several sprigs of fresh thyme, a dried bay leaf, and a half-teaspoon of whole black peppercorns inside a leek leaf or a pouch of clean cheesecloth.
Gently slide these vegetables and herbs into the simmering pot around the 3-hour mark. Submerge them carefully with the back of a slotted spoon, avoiding any broad stirring motions that disturb the bone bed beneath.
Passive Straining and Rapid Basin Chilling
The final extraction phase requires patience and gravity. When the bones feel chalky and brittle, their collagen fully evacuated into the water, pull the stockpot from the heat. Let it sit completely still on a cool surface for 15 minutes. This resting pause lets heavy bone chips and fine mineral sediment fall to the bottom of the pot, creating distinct strata: clear liquid on top, sediment at the base.
Prepare a receiving vessel, such as a second deep stockpot or a wide stainless steel bucket, fitted with a conical chinois or a fine-mesh colander lined with two layers of damp, unbleached cotton cheesecloth. Do not dump the contents of the pot through the strainer. Pouring turbulence flushes the heavy sludge from the floor of the pot straight through the cloth weave.
- Use a deep, long-handled ladle to gently transfer the hot broth from the upper layers into the lined strainer, moving slowly to avoid splashing.
- Continue ladling downward until only two inches of liquid remain above the settled bones and debris. Stop here; strain those final muddy dregs into a separate jar for pan deglazing rather than mingling them with your centerpiece stock.
- Under no circumstances should you press, squeeze, or mash down on the vegetables and bones trapped in the cheesecloth. Pressing squeezes out cloudy cellular paste and emulsified fat, ruining hours of careful clarity work. Let gravity draw the liquid down on its own.
Now, we must drop the temperature swiftly. Holding warm stock between 70 and 135 degrees Fahrenheit creates an ideal breeding ground for ambient bacteria, and slow cooling in a thick vessel can turn a fresh stock sour overnight. Set the receiving pot into a kitchen sink filled with an ice-and-water slurry that matches the level of the liquid inside the pot. Stir the stock with an ice paddle or a sanitized stainless steel whisk to shed heat rapidly. Once the liquid drops below 40 degrees Fahrenheit (4 degrees Celsius), transfer it into clean storage vessels.
Common Mistakes in Stock Craft
Even experienced cooks run into cloudy or lackluster broths when small process habits go unexamined. Here are the frequent points of failure we see at the stove:
- Boiling the Liquid: Boiling mechanically churns fat and albumin into an inseparable colloidal emulsion. Once a stock turns chalky white from a hard boil, no amount of straining will reverse the opacity.
- Using Raw Brassicas or Starchy Peelings: Cabbage, broccoli, turnip greens, and potato peels release sulfurous compounds and starchy particles that turn the liquid dingy, bitter, and cloudy. Reserve those for the compost pile.
- Salting the Pot Early: Stock is an ingredient, not a finished soup. If we add salt at the start, the subsequent reduction during cooking or later sauce-making concentrates the sodium, yielding an overly salty base that cannot be dialed back. Keep the stockpot completely unsalted.
- Shoving Vegetables to the Bottom: Tucking aromatics underneath the bone mass traps them against the hot base of the pot, where they scorch, cloud the water, and scorch the bottom metal.
Next Steps in the Kitchen
Once chilled overnight in the refrigerator, your stock will reveal its true character. The liquid should be set into a firm, gelatinous block that jiggles when scooped with a spoon, capped by a clean, solid, pale disc of rendered chicken fat. Because you refrained from boiling the stock, this top fat layer lifts off cleanly in one piece with an offset spatula, leaving no greasy film behind. Save that clean fat (schmaltz) in a glass jar for roasting potatoes or sweating mirepoix later in the week.
Divide the clarified jelly beneath into 1-quart glass jars for the refrigerator, where it will keep happily for 4 to 5 days. For long-term preservation, portion the stock into wide silicone cube molds or freezer-safe containers, leaving a half-inch of headspace for expansion. Frozen solid, this cold-extracted stock retains its vibrant clarity and sweet, clean body for up to 6 months, standing ready whenever your cooking calls for authentic liquid craft.