When a kitchen knife begins to skate across the slick skin of a bell pepper rather than biting cleanly into it, we know the steel requires attention. Dullness is not simply a loss of sharpness; it is an alteration of the blade profile. Through cutting against end-grain cutting boards, striking bone, or rubbing against counter surfaces, the microscopic apex of the cutting bevel folds, chips, and rounds off. Restoring this edge is quiet, rhythmic handwork that roots us in the workshop tradition of balancing tool steel against natural or synthetic abrasive minerals.
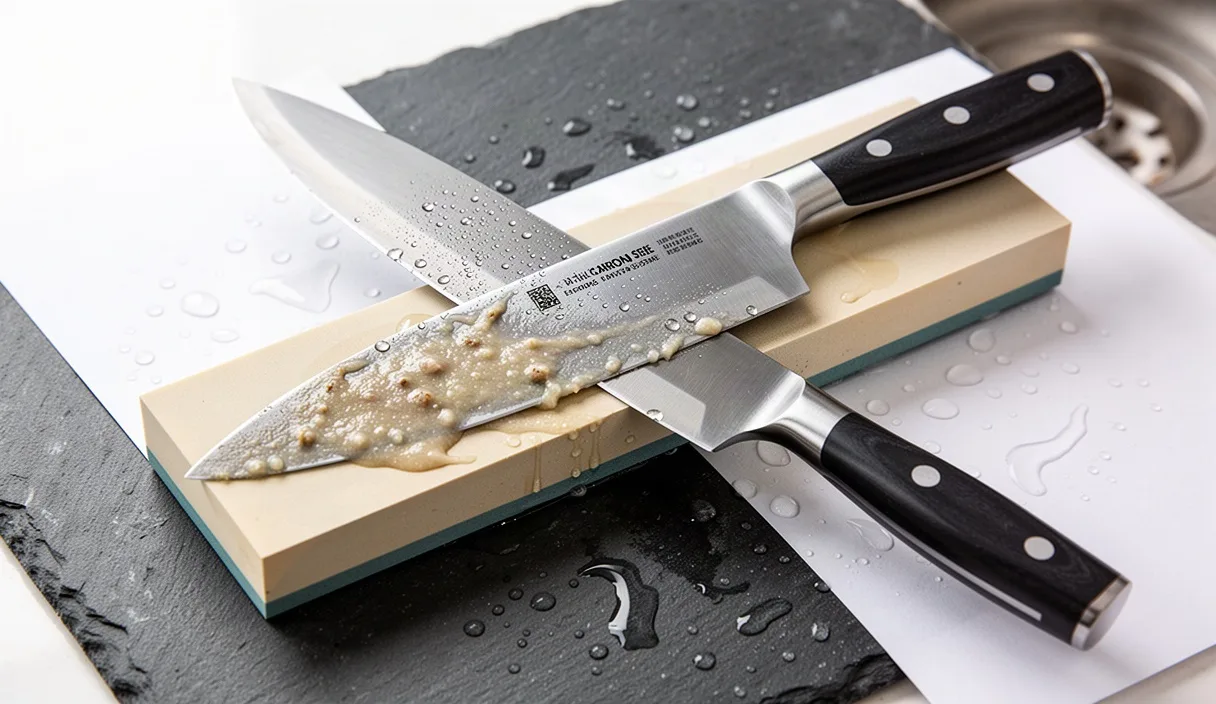
Synthetic Japanese waterstones remain our preferred tool for this restoration. Unlike oilstones, which use petroleum-based lubricants and tend to glaze quickly under hard steels, waterstones cut quickly, clear their swarf continuously with plain water, and leave an edge that balances bite with polish. Working with them demands an understanding of stone hardness, pressure distribution, and the sensory cues of sound and slurry. By learning to reshape the secondary and primary bevels on abrasive blocks, we take full responsibility for the lifespan of our tools.
Preparing the Stones and Workspace
Before steel touches mineral, the sharpening station must be stable and level. We work on a sturdy bench or countertop cleared of clutter. Wet waterstones release a slurry of binder and grit that will stain raw wood and marble, so we spread a heavy rubber service mat across the counter. Atop this sits a stone sink bridge or a heavy silicone base fitted with a threaded clamp to hold the block securely. Movement in the base translates directly into angle inconsistency at the blade edge.
Waterstones generally fall into two categories: soaking stones and splash-and-go stones. Knowing which type sits on your bench dictates your preparation routine. Soaking stones, often porous clay-bound or resinoid compositions, must be fully submerged in clean, ambient-temperature water until bubbles cease to rise to the surface. Splash-and-go stones, frequently magnesite-bound or high-density ceramic, will degrade or soften if submerged for extended periods; they require only a mist of water across their surface before use.
| Stone Type | Common Grit Rating | Binder Type | Hydration Requirement |
|---|---|---|---|
| Coarse Shaping Stone | 320 to 500 | Ceramic or vitrified clay | 10 to 15 minute water soak |
| Medium Working Stone | 1000 to 2000 | Resinoid or clay matrix | 5 to 10 minutes or surface mist |
| Fine Polishing Stone | 4000 to 8000 | Magnesite or hard resin | Surface mist only |
| Flattening Plate | 120 to 220 diamond | Electroplated nickel plate | Splash of water |
Every stone must be flat before sharpening begins. A dished stone rounds the bevel, preventing a crisp apex. We keep a diamond flattening plate beside our water reservoir. Rubbing the diamond plate across the wetted stone in overlapping circular passes reveals high and low spots. The low center will remain wet and dark while the flattened perimeter shows a freshly ground surface. We continue until the stone face presents an entirely uniform, planar surface, rinse the coarse slurry away, and lock the stone into the holder with the coarse side facing up.
Finding and Holding the Primary Bevel Angle
Holding a consistent angle by hand requires muscle memory rather than mechanical rigidity. Most Western chef knives perform best with an inclusive angle of 36 to 40 degrees, which means holding each face at 18 to 20 degrees off the stone face. Thinner Japanese knives ground from hard carbon steels, such as Shirogami or Aogami, tolerate a steeper 12 to 15 degree angle per side. A simple workshop trick helps us find this pitch: stacking two Canadian quarters or three American pennies beneath the spine gives an approximate 15-degree reference for a standard 50-millimeter tall gyuto knife.
Once you verify that clearance, remove the coins and lock your wrists. We do not pivot at the wrist or elbow; the stroke comes from the hips and core, moving the torso forward and backward while the arms act as a rigid triangulated frame. Your dominant hand grips the handle firmly, with your index finger extended along the spine to stabilize lateral tilt. The fingertips of your secondary hand rest directly on the blade face, about two millimeters above the cutting edge, providing localized downward pressure against the stone.
Marking the bevel with a black permanent marker clarifies your progress. Paint the entire factory bevel on both sides with ink. After three light strokes across the stone, inspect the blade under bright light. If the ink is rubbed away only along the back shoulder of the bevel, your angle is too low. If the ink disappears strictly at the very tipline of the cutting edge, your angle is too steep. When the stone scrubs away the entire black band evenly, your angle matches the primary grind of the blade.
Working the Coarse Grit to Raise a Burr
The real metal removal happens on the coarse stone, typically between 320 and 500 grit. We do not progress to finer stones until this coarse stage has produced a complete burr along the entire length of the blade. The burr is a paper-thin curl of abraded steel that rolls over to the opposite side once the two bevel faces meet at a zero-width apex. If you stop before the burr forms from heel to tip, you leave an unsharpened flat flat spot on the edge.
Section the knife mentally into three zones: the heel, the midsection, and the belly and tip. We work each zone methodically. Place the heel on the far end of the stone, apply moderate downward pressure with the fingertips of the supporting hand, about 500 to 700 grams of force, roughly the weight of two large apples, and push the blade across the stone. Pull it back with minimal down-force. Keep a rhythmic cadence of push-pull strokes across a 5-centimeter segment of the blade.
- Heel segment: Keep the blade square to the stone length or angled at 45 degrees, maintaining uniform contact across the flat portion.
- Mid-belly segment: Shift your supporting fingers forward to the center of the blade and continue the push-pull strokes until slurry develops.
- Tip segment: Lift the knife handle slightly to follow the natural upward curve of the tip profile, keeping your supporting finger pads directly over the apex of the curve.
After twenty to thirty strokes on each segment, wipe the blade dry and carefully slide your thumb pad from the spine downward off the opposite side of the cutting edge. Never run your finger along the length of the edge. You will feel a rough, catching wire edge. That tactile catch is the burr. If any spot between the bolster and the tip lacks that catch, return the knife to the stone and work that specific region until the burr is uninterrupted.
De-burring and Refining on Fine Medium Grit
Once the burr is raised along the entire edge, flip the knife to sharpen the second side at the exact same angle. Because the first side established the apex, raising the burr on the second side requires fewer strokes, typically half as many. Once the steel flips back, we transfer the knife to our medium stone, usually rated between 1000 and 2000 grit. This stone eliminates the deep scratch pattern left by the 400-grit mineral particles while condensing the micro-serrations into a refined, durable edge.
On the 1000-grit stone, lighten your working pressure significantly. We drop from 600 grams of downward force down to 200 grams, barely more than the weight of our hands resting on the blade. Heavy pressure on a medium stone gouges the softer matrix and generates excessive heat, which can warp thin blades. Work the blade back and forth across each section, listening to the abrasive scrape change from a coarse crunch to a smooth, sandy hiss. The slurry that forms should look like thin cream; do not rinse it away completely, as this suspended grit smooths out the steel facets.
Before moving on, we must knock off the coarse burr entirely. We perform edge-trailing stropping strokes across the medium stone. Lay the blade at your established angle and pull the edge gently toward yourself, spine first, five times per side, alternating faces with each pass. These light sweeping motions shear away the weak metal foil, leaving a clean, crisp apex that feels razor-like to a light touch without catching thick metal flakes.
Stropping on Raw Leather to Clean the Micro-teeth
A waterstone leaves an edge ground to a specific grit profile, but microscopic loose teeth, known as the foil burr, still cling to the apex. For culinary knives, finishing on a 6000-grit stone can sometimes produce an edge that is too slick, lacking the micro-teeth that saw through waxy tomato skins or cured sausage casing. We bridge this gap by finishing on a piece of vegetable-tanned horsehide or cowhide glued to a flat maple block.
Raw leather strops work through burnishing and microscopic alignment. We use the smooth grain side of the leather, occasionally applying a light film of 1.0-micron diamond paste or green chromium oxide compound to speed the polish. If using bare leather, ensure the surface is clean of dust, pet hair, and coarse sharpening grit. One stray particle of 400-grit stone embedded in leather will scratch hours of patient bevel work.
- Place the strop on your rubber mat with the leather facing upward.
- Set the heel of the knife flat on the leather, then tilt the spine upward until the bevel rests fully against the skin. Do not lift higher than your sharpening angle, or you will round the apex.
- Pull the knife backward along the leather, moving from heel to tip in a single fluid motion with the spine leading. Use only the weight of the knife itself.
- Flip the knife over the spine, never across the sharp edge, and pull the reverse side down the strop.
- Repeat for 10 to 15 alternating passes per side.
Testing the Edge on Paper and Tomato Skin
A maker verifies results through objective physical tests rather than speculation. We begin with standard 20-pound printer paper. Hold an uncreased sheet by its top corner with your non-dominant hand. Place the knife heel on the top edge of the paper and draw it smoothly downward and forward without downward chopping force. The blade should glide through the sheet silently with zero tearing, snagging, or paper dust. If the cut catches halfway down the stroke, inspect the blade at that corresponding location: a ragged micro-burr or flat spot remains.
The definitive kitchen test requires a ripe, unblemished tomato. Set the tomato on your cutting board without anchoring it with your fingers. Place the knife heel against the surface of the skin and draw the blade backward without applying downward hand pressure. A properly honed edge will break the skin under its own gravitational weight and slice cleanly through the flesh without venting juice or bruising the underlying cell walls.
If the knife passes the paper cut but slides off the tomato skin, the bevel has been polished too smooth or rounded during stropping. If you notice structural chips, severe warps along the blade length, or an asymmetrical bolster that impedes stone contact, waterstones alone may be insufficient. In those situations, consult a professional cutlery grinder equipped with low-speed water-cooled belt systems to reprofile the tool before continuing routine maintenance by hand.
Common Mistakes
The most frequent error we encounter is fluctuating the bevel angle during the stroke. New sharpeners tend to lower the knife spine as they push forward and raise it as they pull back, turning flat bevels into rounded, blunt wedges. Keep your wrists fixed and move your torso as a unit to maintain plane stability.
Another common misstep is inadequate stone hydration. Allowing a waterstone to dry out turns the accumulated metal swarf into a hardened glaze that burns the blade face instead of cutting it. Keep a squeeze bottle of water beside your stone bridge and apply a few drops the moment the stone surface loses its glossy sheen.
Lastly, moving up in grit too early accounts for the majority of dull knives coming off fine stones. A 4000-grit polishing stone cannot fix an edge that was not fully apexed on the 1000-grit stone. If you did not raise and remove a uniform burr on your coarse stones, fine stones will simply polish a blunt corner. Verify your burr along every millimeter before reaching for a finer block.
Practical Next Steps
Begin by selecting an inexpensive utility knife or an old pairing knife from your drawer before attempting to sharpen your prized hand-forged chef knives. Familiarize your hands with the muscle balance and tactile vibration of grit abrading steel. Set aside 45 minutes on a quiet morning when you will not be rushed.
Gather your stone set, a durable rubber surface mat, a spray bottle of tap water, a permanent marker, and a diamond flattening plate. Work through each grit progression calmly, pausing to feel the burr with your finger pads after each pass. With patience and attention to the material, maintaining your kitchen cutlery becomes a restorative craft rather than a culinary chore.