We all know the specific, sinking feeling of lifting a heavy cast iron lid to find an aromatic braise reduced to a blackened crust across the base of the vessel. A slow stew left untended or an artisan sourdough loaf baked at high temperature can leave carbonized sugars and polymerized oils welded to the pale floor of a Dutch oven. The immediate impulse is often aggressive: to reach for a stiff wire brush, a steel scraper, or an abrasive scouring powder to force the residue off the surface.
Yet an enameled vessel demands an entirely different approach. It is not raw cast iron, which can be aggressively scraped down to bare gray metal and re-seasoned over an open hearth. An enameled Dutch oven is a composite tool, combining a massive cast iron body with a thin, fused skin of porcelain glass. When food burns onto this surface, we must clean with chemistry, gentle thermal cycles, and patient mechanical friction rather than brute force.
The Vulnerability of Vitreous Glass Enamel
To treat a scorched Dutch oven effectively, we must first look closely at what vitreous enamel is. Enamel is not a chemical paint or a synthetic polymer coating. It is true glass. Manufacturers take a formulation of quartz, feldspar, borax, and metal oxides, ground into a fine powder known as frit. This slurry is applied directly onto the raw, cast iron body and fired in an industrial kiln at temperatures ranging between 780 and 850 degrees Celsius. In the heat of the furnace, the glass melts, flows into the microscopic pores of the rough iron surface, and fuses into a continuous ceramic glaze.
This glass skin provides profound culinary advantages. It prevents acidic liquids like wine, vinegar, and tomato juice from reacting with the iron underneath. It requires no seasoning and will not transfer metallic flavors into delicate broths. But vitreous glass has structural limitations. While glass possesses exceptional surface hardness, it has practically zero tensile ductility. It cannot stretch, flex, or yield under focused physical impact.
When we attack baked-on carbon with stainless steel scouring pads, copper wool, or harsh mineral scouring powders, we may remove the charred fond, but we pay a high mechanical cost. These abrasives cut microscopic scratches into the smooth surface of the glaze. Over months of use, these fine grooves turn the glossy floor into a matte finish. This abraded texture acts like tiny mechanical anchors, grabbing onto proteins and fats during subsequent cooks. Once the factory gloss is ground away by harsh cleaners, food burns onto the surface far more quickly, and releases with far more difficulty.
Thermal Shock and How to Avoid Crazing
The bond between the iron core and the outer glass skin relies on careful thermal engineering. Cast iron expands as it heats and contracts as it cools. Vitreous enamel is formulated to match this rate of thermal expansion as closely as possible, but the two materials never behave identically. Iron conducts heat rapidly, whereas glass is a thermal insulator that disperses heat slowly through its depth.
When an enameled pan experiences an abrupt, violent swing in temperature, the iron core and the ceramic skin change volume at disparate rates. If we carry a scorching hot pan directly from a 230-degree oven to the sink and douse it with cold tap water, the surface glass contracts almost instantaneously while the thick iron base beneath remains swollen with residual heat. The shear stress along the bond line causes the glass to fracture, producing a spiderweb pattern known as crazing.
Crazing consists of hairline cracks that compromise the integrity of the cooking surface. At first, crazed glass may not flake off, but with every subsequent heat cycle, oils and moisture force their way into these micro-fissures. Eventually, the bond fails completely, causing tiny flakes of glass to pop out of the floor and enter your food. To protect the vessel, we must observe a strict cooling protocol whenever scorching occurs:
- Remove the dry, scorched vessel from the active heat source immediately.
- Set the pot down on a neutral, heat-resistant surface such as a wooden trivet or an unlit burner ring. Never set it onto cold stone or wet stainless steel counters.
- Leave the pan undisturbed for 35 to 45 minutes until the iron cools naturally to ambient room temperature.
- Test the exterior base with the back of an open hand. Only when the iron feels completely cool to the touch should you begin introducing liquid into the pot.
The Baking Soda Simmer Technique
Once the pan reaches room temperature, we turn to simple alkaline chemistry to break the grip of the carbonized food. Ordinary sodium bicarbonate, or baking soda, is our most dependable cleaning agent. In an aqueous solution, sodium bicarbonate produces a mild alkalinity with a pH of roughly 8.3. This level of alkalinity is strong enough to hydrolyze and saponify scorched organic fats, converting stubborn grease into water-soluble soaps without etching or degrading the silica structure of the enamel glaze.
Rather than scrubbing a dry, scorched pan with baking soda, we simmer it gently in water. Heat increases the kinetic energy of the solution, allowing the mild alkali to soften the stubborn matrix of burnt protein and sugar.
- Pour cool tap water directly into the cooled Dutch oven until the burnt patches are submerged under roughly 2 to 3 inches of liquid.
- Measure out 3 tablespoons of sodium bicarbonate and stir it into the liquid using a wooden spoon. The powder does not need to dissolve completely while the water is cold.
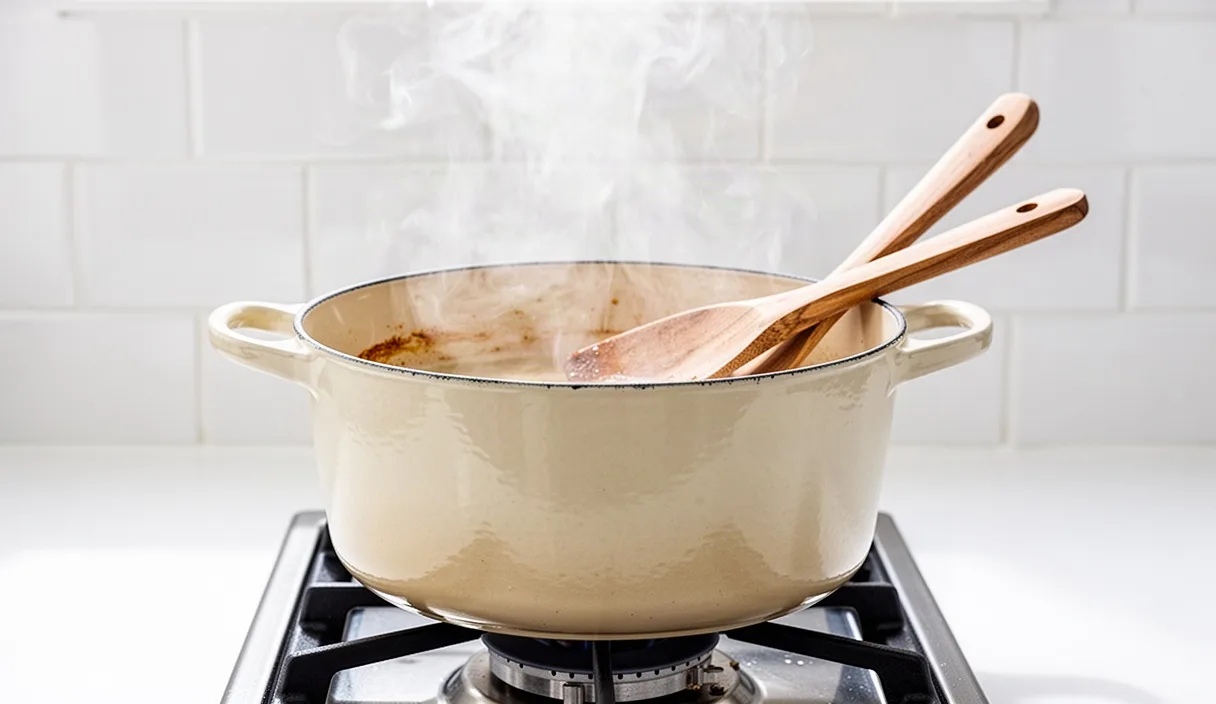
- Place the pan over low to medium heat on your stovetop. Bring the liquid up to a gentle, quiet simmer. Avoid using high heat, which can cause the water to boil off too quickly and risk drying out the base of the pan again.
- Maintain this slow simmer for 15 to 20 minutes. As the bath bubbles, you will see the water turn dark brown or amber as the carbonized crust absorbs water, swells, and releases from the floor.
- Turn off the heat and pull the pot off the burner. Let the liquid cool down for 20 minutes until it is comfortable to work around without burning your hands.
Scraping with Soft Wooden Spatulas
After the alkaline bath has hydrated and softened the scorched mass, we need gentle mechanical assistance to lift the loosened debris from the glass base. Metal tools are completely off-limits here. Even a dull stainless steel spoon has a high edge hardness that can leave stubborn dark metal marks across the enamel or chip the finish if tapped against the sidewall.
We prefer a flat-edged spatula hand-carved from a dense, fine-grained hardwood like beech, hard maple, or bamboo. Soft woods such as pine can splinter under load, whereas beech and maple provide a stiff, uncompromising edge that will yield to the vitreous glass rather than gouge it. Look for an implement with a clean, straight bevel on its leading edge rather than a rounded wooden mixing spoon.
Hold the wooden spatula at a shallow angle, roughly 30 to 45 degrees against the bottom of the pot. Using two hands for steady control, push the flat bevel forward into the margins of the softened carbon. Work deliberately from the cleaner sections of the enamel toward the heaviest areas of build-up. The softened burnt material should peel away in thick sheets or flakes under moderate pressure.
If you encounter an area where the carbon remains rock-hard and refuses to budge under reasonable hand pressure, stop scraping. Do not chip or chisel at the edge. Chisel strikes can propagate shockwaves through the glass layer, causing it to spall off the cast iron beneath. Instead, tip out the dirty, dark liquid, add fresh water and another 2 tablespoons of baking soda, and run a second gentle simmer for 15 minutes to penetrate the remaining layer.
Polishing Residual Stains with Hydrogen Peroxide
After the thick, carbonized crust lifts away and you rinse the pot clean, you will often find dark brown, yellow, or reddish shadows lingering on the pale interior enamel. These are not carbon deposits. They are pigment stains caused by tannins from red wine, carotenoids from root vegetables, or deeply embedded protein films that have settled into the microscopic pores of the glass. Mechanical scraping will not remove them, and scrubbing harder will only abrade the surrounding glaze.
To pull these shadows out of the glass, we use standard 3 percent topical hydrogen peroxide, available at any local pharmacy, combined with sodium bicarbonate. Hydrogen peroxide is an oxidizing agent that breaks down conjugated chemical bonds in organic color compounds, rendering them colorless and water-soluble without using acidic compounds that can etch glass.
- Rinse the pan so the bottom remains slightly wet, then dust the stained floor with a visible layer of baking soda, roughly 3 tablespoons.
- Pour roughly a third of a cup of 3 percent hydrogen peroxide directly over the baking soda. The mixture will foam softly as oxygen is released.
- Use a soft sponge to swirl the components into a spreadable, wet slurry with the consistency of thin pancake batter.
- Set the pot over low heat on your stove for 3 to 5 minutes, just until the liquid begins to produce small, steady bubbles and warm steam rises. Do not let it dry out or boil hard.
- Remove the pan from the heat, set the lid on top to trap the steam and moisture, and let the slurry rest undisturbed for 45 to 60 minutes.
- Wipe the cooled slurry around the pan with a soft cellulose sponge or an unbleached cotton rag. The stains should lift into the paste. Rinse the interior thoroughly with warm running water.
Drying and Storing with Protective Lid Bumpers
Cleaning does not conclude at the sink. How we handle moisture and airflow during storage directly impacts the working life of an enameled vessel. Many cooks do not realize that while the interior and exterior bowls of a Dutch oven are clad in colored glass, the rim of the pot and the outer flange of the lid often have only an ultra-thin, porous ground coat applied to prevent flashing, or they expose the ground iron edge directly.
If you wash a Dutch oven and immediately drop the heavy lid back onto the pot, residual moisture becomes trapped against these exposed iron margins. In the dark, stagnant environment of a closed cupboard, this trapped water causes oxidation along the contact surfaces. Within days, a ring of orange rust will develop along the rim, which can bleed down the interior walls and stain the clean enamel.
After your final rinse, wipe the pot thoroughly with a heavy, lint-free cotton cloth. Pay careful attention to the unglazed rims and the underside of the lid handles. Let both pieces sit separated on an open wooden drying rack or a dry towel for at least 30 minutes, allowing any moisture lingering in microscopic pores to evaporate into the air.
When stowing the pot, prevent direct metal-on-metal contact. When cast iron rests directly on cast iron, small movements in a drawer or shelf can chip the perimeter glaze. Always use protective bumpers:
- Clip the four small plastic or silicone edge protectors that originally came with the cookware back onto the rim before resting the lid on top.
- If you no longer have the original plastic clips, clamp four wooden spring-type clothes pegs around the perimeter of the rim.
- Alternatively, fold a clean, dry cotton kitchen towel into a long strip and drape it across the opening of the pot, allowing the lid to rest softly on the textile cushion.
These bumpers serve two functions. They protect the vulnerable enamel edges from impact chipping, and they maintain an air gap of several millimeters. This continuous airflow keeps the interior completely dry and prevents musty odors from accumulating inside the enameled chamber between cooking sessions.
Common Mistakes
In our workshop, we frequently inspect pans that have been permanently ruined by well-intentioned cleaning efforts. Vitreous enamel responds poorly to standard kitchen cleaning habits that work on stainless steel or unglazed cast iron.
| Cleaning Method | The Hidden Damage | Proper Alternative |
|---|---|---|
| Chlorine Bleach Soaks | Chemically leaches minerals from the glaze, permanently clouding the finish and creating microscopic surface pits. | Warm 3 percent hydrogen peroxide and baking soda slurry. |
| Stainless Steel Wool | Gouges deep channels into the smooth silica surface, permanently destroying food release properties. | Flat-beveled beechwood or bamboo spatulas. |
| Citric Acid / Lemon Boils | Prolonged boiling of strong acids can dull the high-gloss ceramic finish over multiple applications. | Alkaline sodium bicarbonate simmer. |
| Thermal Quenching | Shocking a hot pan with cold tap water produces immediate crazing and micro-fractures in the glass. | Passive cooling on a wooden trivet for 40 minutes before adding water. |
Practical Next Steps for Restoration
Before you begin the cleaning process on a heavily scorched vessel, examine the pot under a bright task light. Run your bare fingertips gently across the burnt area. You need to identify what you are feeling beneath the char.
If the surface feels raised, rough, and irregular, you are dealing with a top layer of carbonized organic material. This can be safely resolved by following the baking soda simmer and wooden scraping process described above. Take your time, work in two or three gentle cycles if needed, and let the alkaline chemistry do the physical labor.
However, if your fingernail drops into a distinct depression, or if you feel a sharp, jagged edge on the floor of the pan, the vitreous enamel may have chipped away down to the raw iron beneath. Take note of where this occurs. A small chip on the exterior wall of the pot or on the outside of the lid is primarily an aesthetic issue that will not affect your food. But if the enamel on the interior cooking floor has fractured and exposed bare iron, the pan should be retired from direct food contact. Once an interior surface chips, the surrounding glass edges remain fundamentally unstable, and tiny shards of glass can continue to dislodge into your food as you cook. If you suspect an interior fracture has occurred, consult the customer support team of your cookware manufacturer to inquire about professional assessment or replacement options under their craft warranty.